

Learn the best practices for migrating WordPress send/receive email at your custom domain. Watch how I migrate emails like from shared WordPress hosting to a dedicated email host at Rackspace.
In this video, I demonstrate migrating an existing custom email address, and all the hosted and saved emails at the server, from SiteGround website hosting to Rackspace Cloud Office email hosting. Best practices in 2021 into 2022 indicate that hosting email at the website server shouldn’t be done, and hosting email at a dedicated email host is much better. Rackspace is an inexpensive option, Google Workspace (formerly Google for Business and GSuite) is a good option too. Free custom domain email hosting can also be set up at Zoho.com.
Hey, and welcome, I am going to migrate hosted email from a web hosting client that I have at SiteGround flow coaching.com. And to migrate that email to a hosted email system at Rackspace that I’m setting up for that domain name. And so as you might remember, we’re migrating flow coaching, com over to grid pain hosting from SiteGround. Well, we don’t want to mess up the email system. And so I’ve taken control of the DNS. And by doing that, I’m able to move the website separately from the email and then move the email at my leisure and make sure that it’s all working in the background.
I’m Gregg Davis, and this is leverage WordPress. And welcome to this tutorial on email migration. To get started, take a look at the screen here. As you might have remembered, this is the new flow coaching website. And this is hosted at good pain at a staging subdomain. If you look up here at staging dot flow coaching.com, I have all the original pages up here and I’m in the process of changing over to the Divi theme and redesigning all these pages here in the drop down for Chris’s website. Now, while this is hosted at grid pain here, the original site is still hosted at SiteGround. This is what the homepage looks like. And the way that I’ve been able to do that is to take control of the DNS settings by using my free version of CloudFlare, where I point the name servers from the domain host, which is GoDaddy, Chris has an account at GoDaddy pointed over to Cloudflare and manage the DNS settings in Cloudflare.
What that means is that I can take these, leave these MX records over to these records, which points to the SiteGround email system that’s in place right now. And I can also leave the a record for flow coaching comm at this 35.208 IP address. That’s the original SiteGround website. However, I made this staging subdomain a record which points to a different IP you can see here 209 dot 50. That one’s over at grid print. So if we look at SiteGround under this account, flow coaching.com under email, I don’t have any email forwarding going on. But I have two email accounts to move. One is his main email Chris at flow coaching comm has 433 megabytes and unlimited quota. And this info at that he uses a little bit as a reply address for email communications has zero megabytes in it, but we’re going to migrate this one as well. And with this email system I’ve just looked into where I’m going to move the emails now I host email for clients sites at Rackspace email, or Rackspace office, which means that I set up domain names to host business email. And then for 299 a month per email address for 25 gigs.
You can set up mailboxes as well as alias addresses that don’t count towards your quota at all in Rackspace. But this is similar to something like Google workspace, which is $5 a month per email address for 30 gigs. And there’s other services out there that do this, I do prefer Rackspace. And just hosting email at a separate place from your website is a best practice because they maintain these IP addresses for outgoing email and make sure that they are have a good reputation for email sending. So deliverability is on point. And so I logged into my Rackspace account here and I know that I have to add Chris’s domain name and create an empty email address for those two email addresses first. And so first, I’m just going to, you know, what I did is I went down here and add it went to domains and clicked Add new domain. And I’m going to add this domain, I own the, the domain because I have control of it.
And I’m going to do a standard 25 600 megabyte mailbox size basic email, and just click Save. So now I’m starting with this email address at this domain now, I have zero mailboxes at the domain, but I do have the domain setup at Rackspace. And so I’ll now go and okay, I’ve clicked that domain name. Now what I want to do is set up Rackspace email. So I click Rackspace email up here. And under this domain name, there aren’t any mailboxes. So I’ll create one. And this is where I would start to incur my charges. And so I am going to set this up and start filling it with email. today. I’m going to migrate all of Chris’s email over there. And so I’m just going to put in the relevant information.
The only thing required is the email address, and then I’ll do a password. Let’s pause the video quick while I put that in. I don’t need this to be visible in the Rackspace email Company Directory, but I can add mailbox Oh, password doesn’t meet requirements. So let’s select a new one. Pause for a second. I just used a password generator from Dashlane. To easy browser, browser Password Generator makes it easy. So let’s add that mailbox and I did save this password and document off to the side here. Because we’ll need that password to be able to set up Chris’s email on his device once it’s moved the hosting from one place to another. Okay, so that email address should be available in a few minutes, let’s add another email box. In fact, I’m not even going to add this other email as an email box.
I don’t think there’s very many emails in there. In fact, if you look at the email addresses here, it says zero megabytes out of the 250 quota. So I might set that up in order not to incur the extra expense of the email address, I’m just going to set up forwarding of this address over to the other one, if needed. I can go in here and manually forward all these emails into this box if he wants to keep them. But Let’s transfer this into a single email just into two. And so what I’ll do down here over at Rackspace is instead of setting up a new email address, I’ll set up an alias eFlow coaching. So if I had info at oops, info at float coaching calm, have it be an alias of this email.
And that’s just like email forwarding. Basically, if an address if an email comes into info at it will automatically appear as an email to Chris at. Okay, so what’s next? If I look over here, I looked at email migration services under Rackspace. And here’s where I got to where I am. So far, there’s there’s two email migration services offered by Rackspace support both free of charge unless you need a lot of extra help. But this external migration service and an internal migration services, really, I’m using an external migration service.
And I’m going to be using the self migration tool, it’s just a single, really two email addresses merging into one and I don’t need assisted migration. This will be for companies that need help, consulting, planning and scheduling a migration like if there were lots of different people using email addresses at the company’s domain and you’re moving all of them over. We’re going to address this even for the single email address. But with the self migration tool, I’ll be able to migrate everything over while Chris’s email is still open and working. And then just before we we move the DNS over or just after we’ll do an additional migration process, which will pull the any remaining emails that came in, so none are missed. And so I’ve from here, I’ve clicked the migrate your email using self service migration tool. And then there’s this instruction document here, which is pretty straightforward. Basically, the first thing you want to do is what I’ve just showed you here, create the mailboxes.
And so I created a mailbox, and I’m going to migrate the major mailbox into first. And so a good warning here, don’t cancel the source mail service until you’ve confirmed with all the users that they have their email data. And so I’ll be doing that with Chris and confirming that he does have that. So let’s see what else I need here. Addresses usernames and passwords for the source and the destination mail servers, I believe I have all the information that I need. Basically, I need to be able to log in on both sides, the source and the destination from SiteGround over to Rackspace. So make sure you can update the DNS records at your DNS host. And you know that I have that available here in Cloudflare. And so, review the list of items migrated. I only need email honestly 70%. Yeah, the size is going to be a non issue. Refrain from changing their passwords. Yeah, my clients not going to change his password. You can export data into a PST, PST file to have a local backup. But I’m not going to do that. I don’t think we need to do that. For more information, prepare these I don’t need any of that. I think so I think what I’ll do is migrate email so it says login go to domains, click Email migrations.
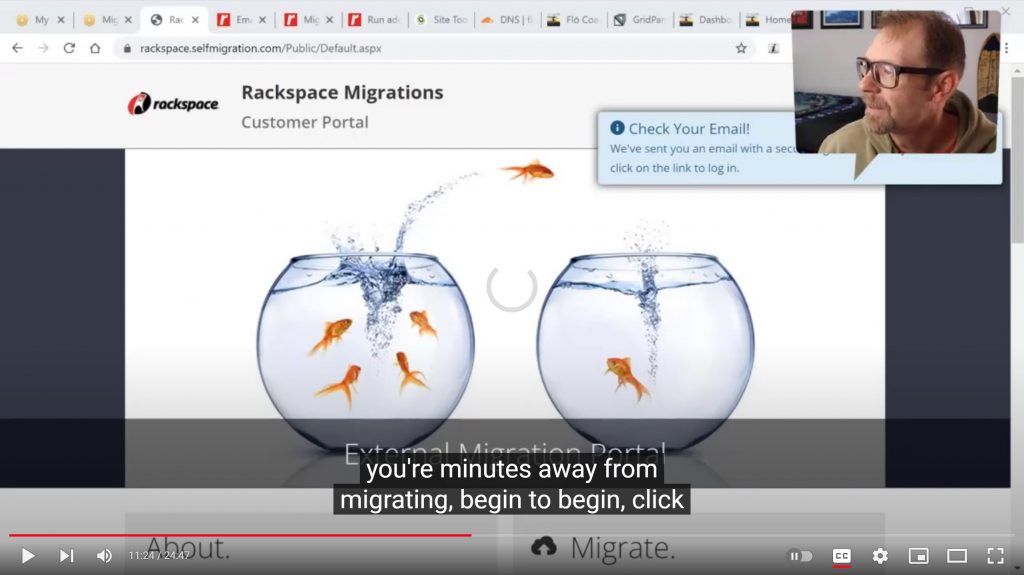
I can go directly from here to self service migration tool. So domains and at the bottom of the screen email migrations. So that means here under domains I might be able to look down at the bottom type of service mountain. Is it down here? There it is migrations IMAP to Rackspace email is what I’m doing. And that get started with a migration Wiz. IMAP, that sounds right. So if I click Start migration now, yeah, it’s the self migration address here at the top. And so let’s get this started. External migration portal, Okay, this looks right. This is communication about this migration, okay. All right, I filled out my personal email address there. And they’ve sent me a Secure Login link. And I’m doing that here. I’ve received an email from them, it says you’re minutes away from migrating, begin to begin, click on the following link. Alright, so that’s opening this tab inside the browser that you can see here.
And this looks like some of the screenshots I saw in that document says it’s good. It’s gonna go specify servers, connect, associate mailboxes, trial, test the configuration, review the migration, and then migrate their mailboxes finally, and then complete. Okay, so let’s locate the server information. And so this is an IMAP. And I need the server name and the port. So this is just like, logging in setting up. You know, your your site ground email. So if I want to go, let’s try and find that authentication. Let’s see what all I want to find email accounts. And I want to maybe go over here and do a setup. And I want to log in, I want to configure email. And let’s go to manual settings. Here’s where I’ll find everything. And so there’s a mail server. That’s the incoming server name. And then what port are they using? The IMAP port 993?
The destination server is Rackspace email. I think that’s all I need server name server port, it’s going to get my credentials now I think. Sure, there’s emails I know there’s no context and no calendars within this setup. Just email from SiteGround. And over. So now specify mailboxes. Okay, this is where I would put in the different emails and where they’re going to be going. The login name and the password, email login name, password, okay.
So really, that’s going to be the same. And it’s also going to be the whoops the login name, the destination emails the same destination login name is the same. And now I need the two different passwords. So I’ll pause it and go find those. Okay, went and found the original password from Chris’s SiteGround email account that I had set up for him. That’s why I have the password on file. And this is the new password I just created using the password creator randomizer. If at the Dashlane website, this is the new destination email. So let’s just migrate this one only.
I’m not actually migrating that info. Click Next to begin. They’re now going to perform a trial. Okay. I don’t think there’s going to be any folder hierarchies to migrate or anything at all except email addresses within the email box. Now if Chris has created some IMAP folders on there, maybe those are going to come across then that would maintain his setup so I’ll pause the video while this is doing it. I’ve noticed the message says you don’t have to remain on this page for the trial to complete and after Clicking Next, feel free to close your browser and check back later. I’ll also receive an email notification after each mailbox completes, okay, so I can just wait for an email, or come back and check this page to see about this trial. And I’m going to pause the video now.
And we’ll be back. Okay, so that took about 45 minutes or a little more the trial migration is complete. It says, Take a small sample of data from each source to destination mailbox, verify this by logging into your destination mailbox. If you’re satisfied with the results, click Next to continue. Okay, so what I’ll do is go over to my Rackspace account. And just go to the mailbox and login using the web settings. So this mailbox, login as and I’ll just login. So open up a new tab. It shows Okay, so there are some email addresses in there. Yeah, it looks like it did a small subset of 10 emails. Looks good to me, honestly. Great. So what’s next over to Rackspace and click Next to continue says ready for migration. Clicking Next, ready to migrate, we recommend that you set up mail forwarding at this time for each mailbox being migrated. So any new incoming mail will be delivered to the new system.
If you are migrating all the mailboxes, you may wish to change your MX records to the destination before continuing. Okay, so this means that the new mailbox is working right now. And so I should point the MX records for this domain over to the new mailbox first. That way, we won’t lose anything at all soon as I click migrate. And of course, we can do a second migration if we want to.
And so let’s see, you know what I need to do? MX records for cloud office email, that’s exactly what I’m doing. configure DNS to send and receive email in cloud office. Yeah.
So in the following table. Okay, so I’m replacing the Cloudflare MX records right here, which go to SiteGround with the new ones. So what I’ll do is create these new MX records and then delete the old. So let’s see what I have that right over here. And Max, destination priority 10 And then priority 20. So this is the one thing I want to do quickly.
I just copied that destination. Gonna add an MX record for apt for the route there. Go we’ve TTL at auto and that’s going to be a 10 priority.
And now add one more MX record at and this one, oops, this one’s going to be MX to that email server.com. That’s going to be needed here in Cloudflare. That’s priority 20 And make sure that’s correct. Priority 20 Hit save those and let me just quickly do the other two there’s a TXT record and a CNAME record for verification. This is for authentication, an SPF record. So at TXT record hat and then that’s the destination. Okay. So add a TXT record at for root. There’s that. And then I’m also going to add a CNAME record. I believe that’s also to route now, it’s called Autodiscover and it’s called Autodiscover dot email server.com. Okay, now I should go here and delete these Now this is going to push any new email to the new server right away. Okay, great, there we go. And now that I have that MX records over, there’s no forwarding necessary. same email address. Let’s hit next.
Alright, we’re now ready to initiate a full migration. Each mailbox is only one. So depending on the size, it may take a few hours to a day. That small migration took 45 minutes. So we’ll see. I’ll stop the video here. And we’ll see how long this takes till 30 6pm Somewhere starting. There goes, depending on the size of the mailbox, it may take anywhere from a few hours to a day. And I’ll probably get an email again, alright, stopping the video here. Okay, so that took a lot less time, then the trial test configuration did I guess the system did a lot of tests on it. So that only took maybe half an hour or less, says migration is complete, you may verify the contents by logging into your destination mailbox. And so once again, I could come over here and refresh. Those are unread. But I have 18 pages of emails. With however many are on here 20 Something like that. This is where maybe want to compare with the clients experience in the old email box. Now I could go over here actually and log in as the client here. If I log into webmail, yes, that gives me access to the webmail. So.
So I have the most recent email. One, sustainable inclusive. Oops. And then let’s see, well, same kind of system 18 pages. Now Christus needs to change as email programs over 2.2, this Rackspace email box instead of
the other ones. And so I’ll get the settings right here. And be able to tell that to Chris so that he can test a new email box. Awesome.
So there’s an email configuration helper tool that Rackspace has. This is where I found the credentials that I needed to give to the client to change in his email program. He uses Mac mail on his Mac computer by Apple, and also his iOS devices. So I clicked here under this one on Rackspace, under this email address, I clicked setup help open client config tool, which had me login to a support center here with my Rackspace credentials. And so this gave me a generalized inbound and outbound secure IMAP port and an address for the email server for incoming and outgoing, then you just have to use, you know, your email address as the login name and the password that we created here. So I’ve delivered that to the client, I know the email is working. And we’ve got the DNS over here set up, the MX records are going over to the correct place. And so everything seems to be running fine.
What I can do is send a test email. And I’ll just finish by doing that. So what I did was I sent a test email from my own email program. And it looks like that it has been received. And so that’s working. I can even reply and make sure that outgoing email is going out. Send that and make sure I was working. I just saw it pop up over here. So email systems working, Chris just needs to change his credentials inside of his email programs and we’re all set. And then we can continue revising the site and making it what we need it to be.


0 Comments